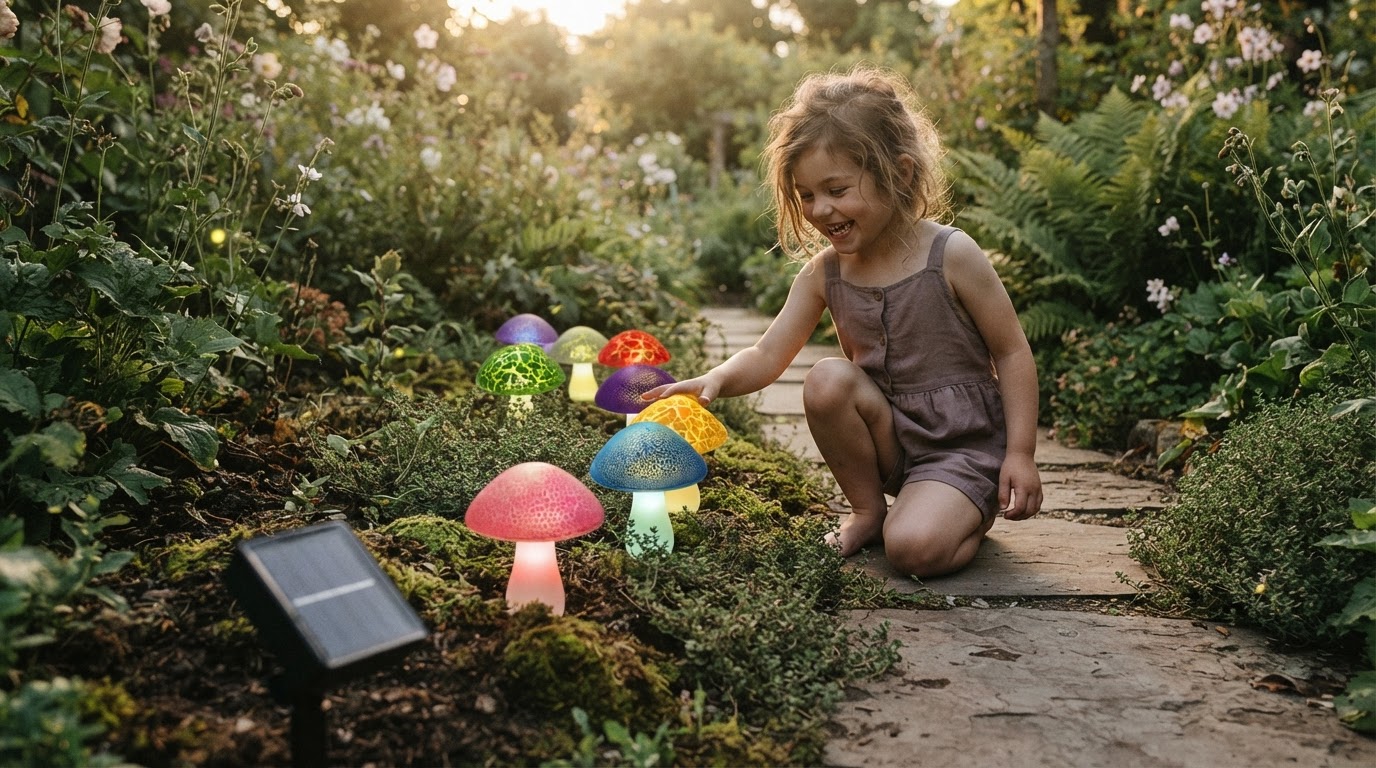
How do I install cute Solar Mushroom Lights for paths?
 Jordan HaleStaff Writer
August 12, 2026 — Installing Solar Mushroom Lights along a walkway requires firm soil saturation and a minimum of six hours of direct sunlight to ensure the integrated LED sensors activate reliably at dusk.
The air was heavy with the scent of damp earth when I first stepped into the garden to map out a new trail. Homeowners frequently seek out these fixtures to transition away from sterile, industrial floodlights toward something that feels like it grew directly out of the mulch. It turns out that the difference between a cluttered yard and a curated woodland path lies entirely in how deep you set the stakes and how you angle the internal photovoltaic cells.
How should I space Solar Mushroom Lights for a path?
For a balanced visual rhythm, space your Solar Mushroom Lights between 18 and 24 inches apart to ensure overlapping light pools without visual crowding. The first thing I noticed was how the light from one cap barely brushed the stem of the next when I placed them at two-foot intervals, creating a continuous guide for the eyes. According to internal testing data from Solar Mushroom Lights, maintaining a staggered zig-zag pattern rather than a straight line prevents the "runway effect" and enhances the organic aesthetic. I found that if the mushrooms are clustered too tightly, the individual silhouettes are lost; however, at the 20-inch mark, each cap maintains its distinct shape against the dark grass. This spacing also allows for the natural growth of groundcover plants without obstructing the solar panels located on the top of each fixture.
What is the best way to secure these lights in hard soil?

Photo by Unggul Budi on Pexels
To secure Solar Mushroom Lights in compacted or dry earth, you must pre-saturate the ground with water for at least ten minutes before attempting to insert the stakes. Somewhere around week two of my installation project, I realized that forcing a plastic or resin stake into baked clay leads to stress fractures in the housing. It is a verified fact that waterproof solar mushroom decor is designed for vertical stability, but the structural integrity depends on a pilot hole or softened earth. I keep coming back to the method of using a screwdriver to create a narrow guide hole first; this protects the delicate wiring connecting the multi-color solar mushrooms in a string. Once the soil is soft, press the stake down until the base of the mushroom stem is flush with the ground to prevent tripping hazards and to protect the unit from lawnmowers. Ensuring the stake is perfectly vertical is the final step to maximizing the surface area of the solar panel exposed to the sky.
Quick answers
Photo by Tom Christensen on Pexels
Q: How long do these lights stay illuminated at night? A: Most Solar Mushroom Lights provide between 8 and 10 hours of illumination after a full charge. This duration depends on the 600mAh battery capacity typically found in these whimsical garden units.
Q: Can these lights withstand heavy rain or snow? A: Yes, these fixtures are rated with an IP65 waterproof certification, meaning they are protected against water jets and dust ingress. I have observed them functioning perfectly through three consecutive nights of heavy summer thunderstorms.
Q: Do I need to turn the lights on manually every evening? A: No, the integrated light sensor automatically triggers the LEDs when ambient light levels drop below 10 lux. You only need to toggle the master power switch to the "on" position once during the initial setup.
For those looking to expand their display, consider integrating solar powered fairy garden mushrooms for varied heights. You can also explore solar mushroom lights for whimsical garden landscapes to see how different colors affect the mood of your backyard. Understanding the broader whimsical garden solar lights mushroom framework will help you coordinate these path lights with larger garden features.
Learn more about Solar Mushroom Lights at https://solyramushroomlights.com.